Set up Locked Print on your computer
The Ricoh copiers have many advanced features, such as collating, stapling, and hole-punching. One of them is the ability to send print jobs securely so only someone with an access code can retrieve the job from the copier. This is actually set up by software on your computer, not the copier, and cannot be set from the copier. These instructions will show you how to set up Locked Print as default whenever you send a print job.
Step 1: Access the Printers and Scanners menu
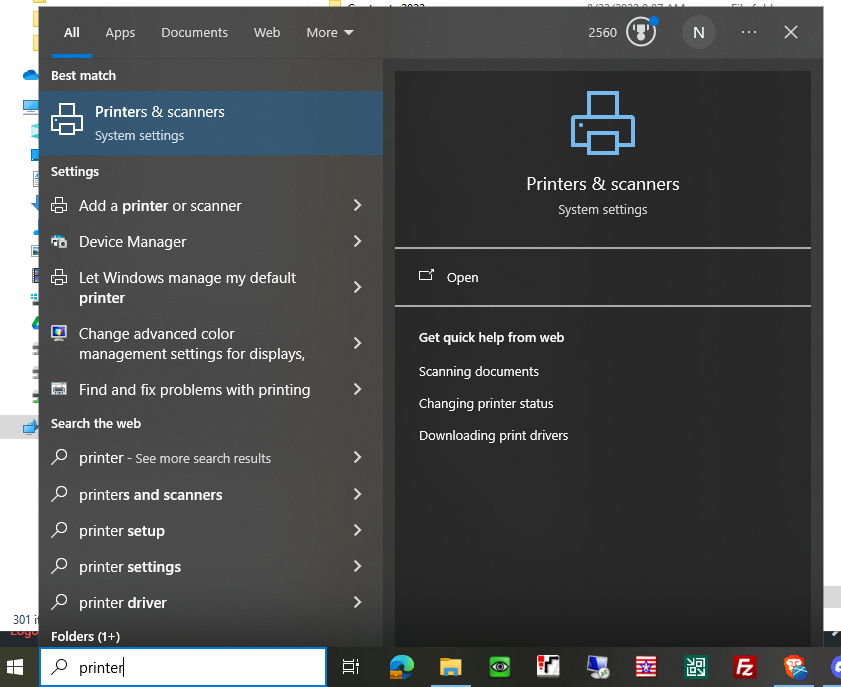
In the Windows search bar, type “Printers” and choose the “Printers and Scanners option” This can also be found under Settings in the Start Menu
Step 2: Select the desired printer
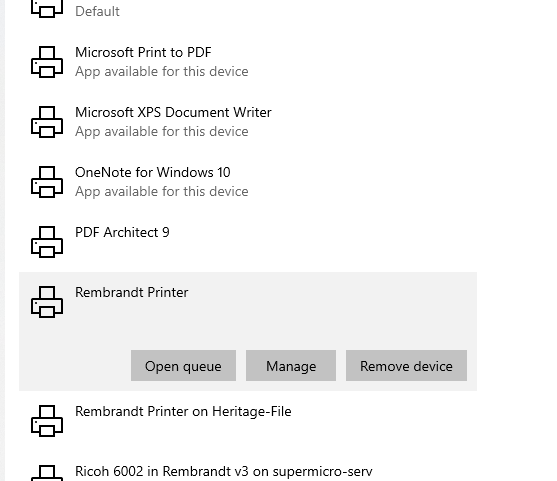
Find the printer you are trying to set up and click “Manage”
Step 3: Open Printer Preferences
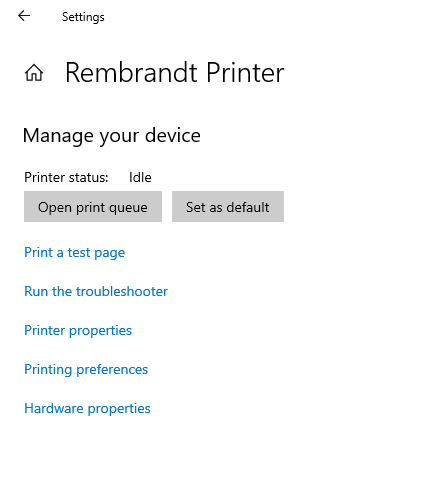
Click “Printing Preferences” underneath the desired printer
Step 4: Access Locked Print Settings
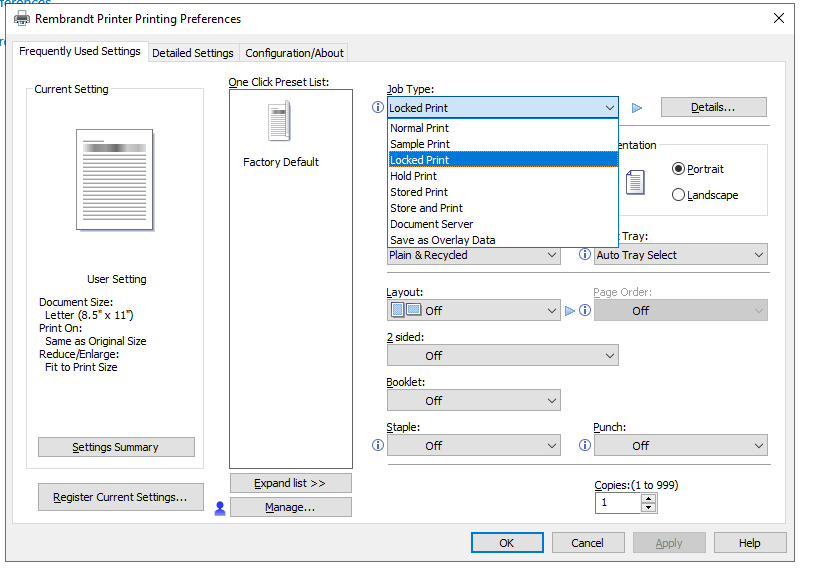
This is the printing options menu you can see any time you send a print job. Since we accessed it through the Settings app, however, any changes we make to this screen will be the default settings every time you print something. Click the dropdown menu under “Job Type”, then select Locked Print Then Click “Details” to the right of the arrow.
Step 5: Set up Locked Print
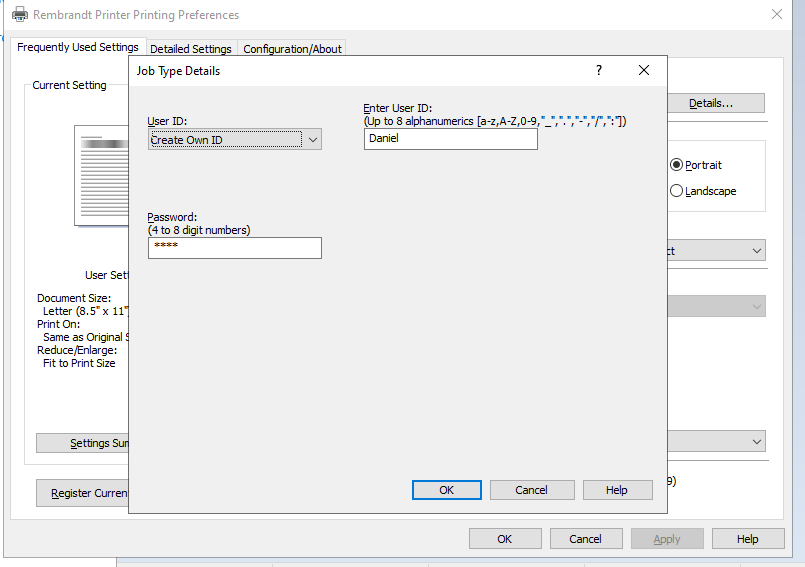
Enter the name you wish to use in the “Enter User ID” Line, then type the code you want to use in the “Password”. Then just hit “OK” twice and you’re done!
Remember, if you ever want a particular print job to NOT be Locked, you can hit “preferences” from the print dialogue and change “Job Type” to “Normal Print”.
Also, THESE SETTINGS DO NOT AFFECT PRINTING FROM EMRitus. Those have to be set as the same for the ENTIRE COMPUTER, which is why most people leave it as unlocked.
